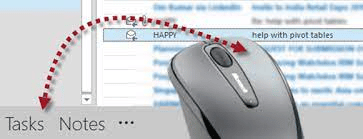
Are you wondering how to create a task from an email in Outlook? Luckily, a simple and efficient way doesn’t involve re-entering all the information. All you need to do to turn an email into a task in Outlook is to select the message and click on it, then drag it on the navigation bar in Tasks. You’ll realize that the contents of your message are copied to the body of the new task, leaving out any attachments.
Save time Creating a Task
Creating a task this way is similar to creating a task from scratch, only that you’ve significantly saved time. The contents from your message automatically appear in the new task, allowing you to make adjustments like setting a due date, assigning the task, or adding a reminder. This eases the entire process of having to create a task reminder, providing a more straightforward solution from within the email itself. You can achieve this in three ways:
Method 1: Create a Task from an Email in Outlook Using Drag-and-Drop
Microsoft Outlook is a versatile tool that allows users to convert emails to tasks by dragging and dropping quickly. Most people mistake deleting a message before completing the task and fail to accomplish what is on their to-do list. With Microsoft Outlook, you don’t have to worry about such issues even after deleting the message. This operation is achieved in two ways:
Create a Task from a Message with Left-Click and Drag
Start with a simple left-click on the email you want to convert, and hold the mouse button as you drag the email to the Tasks in the bottom-left corner of the navigation bar and release. This automatically creates a task containing all the information in the email message without the unnecessary attachments.
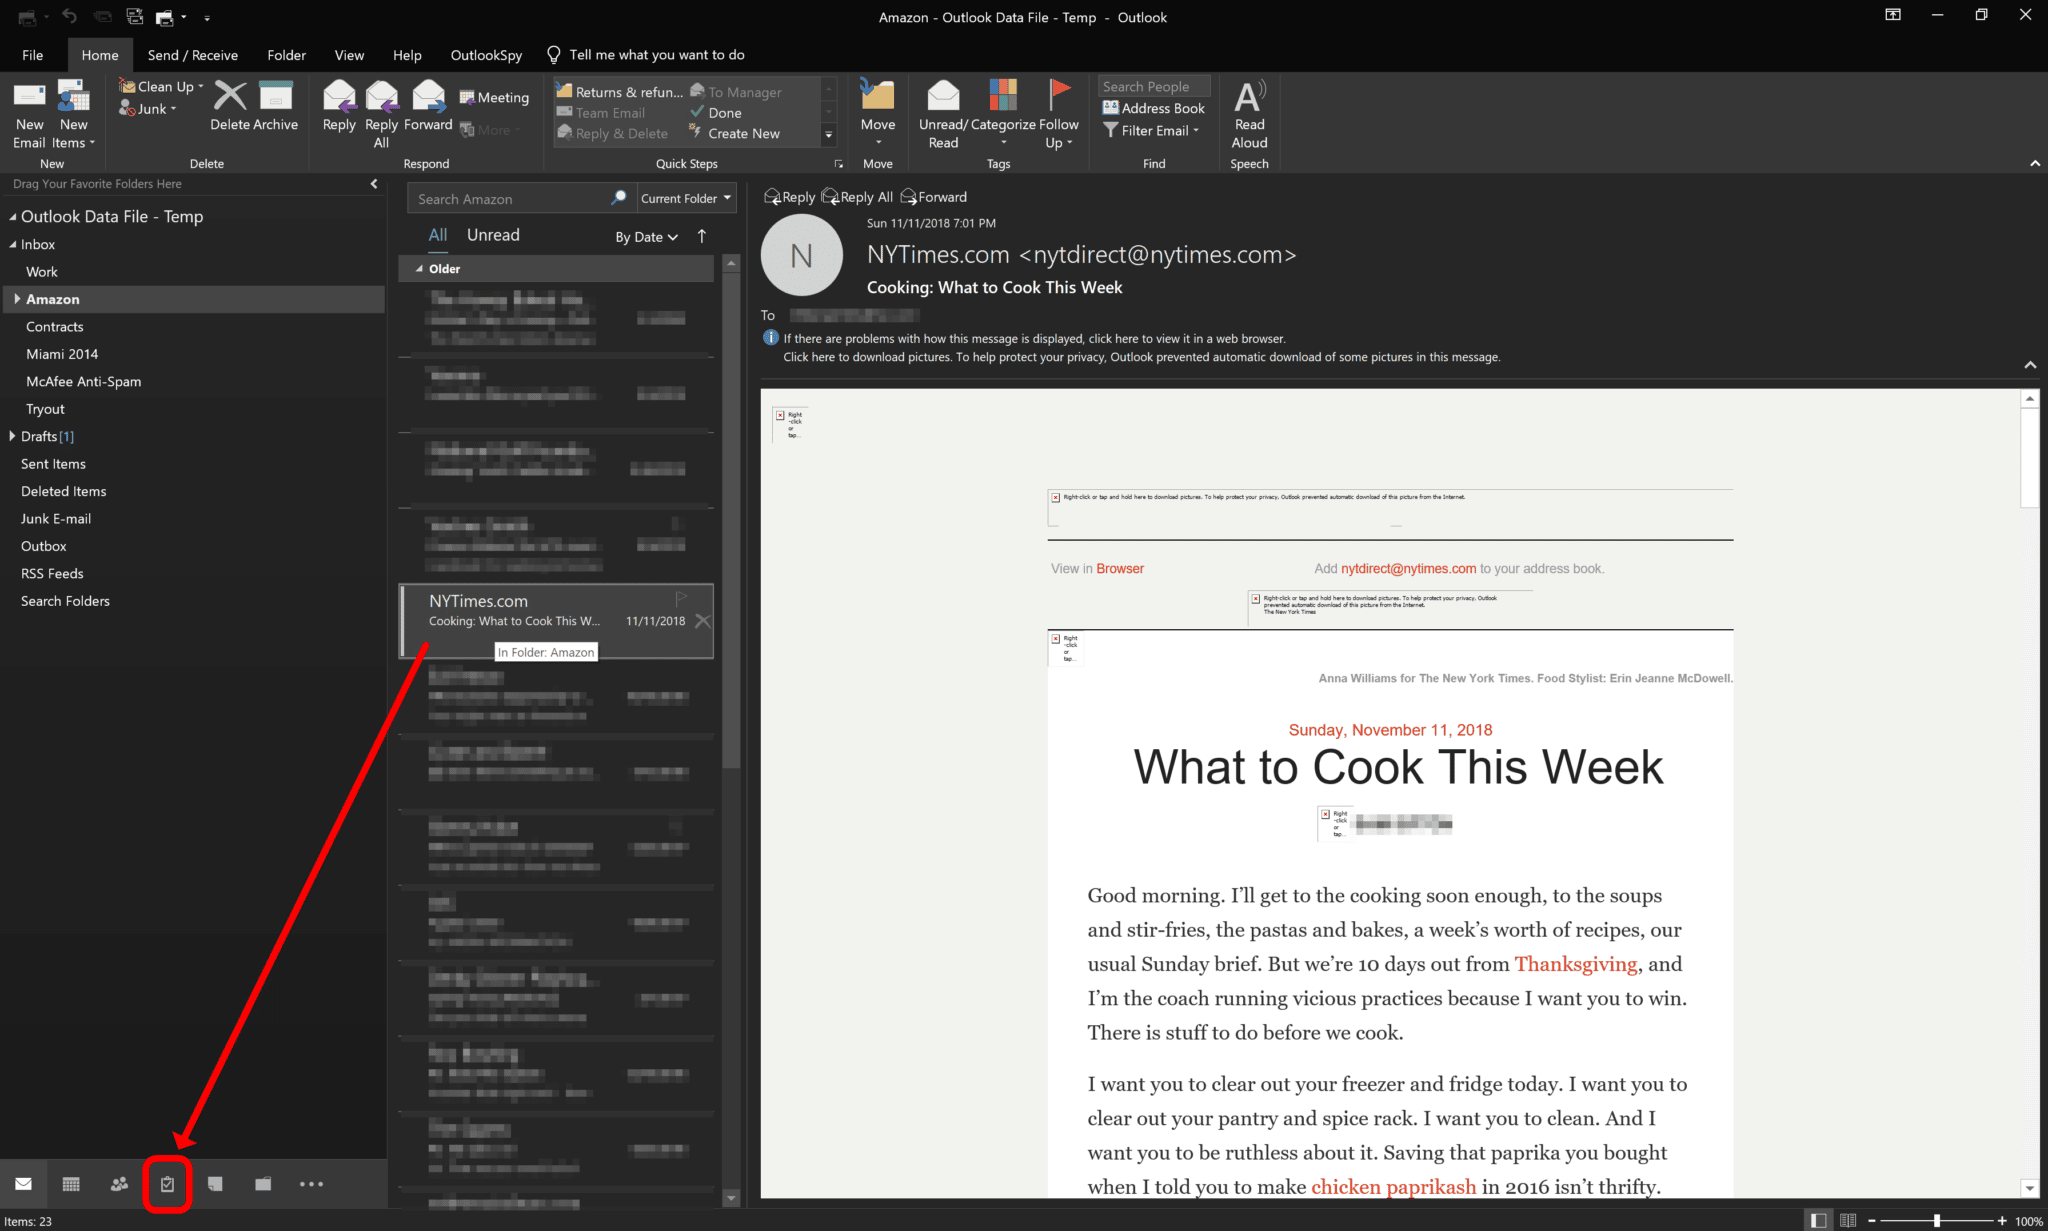

This simple process is the same as creating a task from scratch, only that you don’t have to re-enter all the information. Once the process is done, add a start and due date, set a reminder, or assign the task to someone else.
Right Click and Drag

The exact process can be completed by right-clicking on the email and repeating the same process. However, the only difference is that when you release the message on the Tasks operation in the navigation bar, Outlook gives you three options:
- Copy Here as Task with Text
- Copy Here as Task with Attachment
- Move Here as Task with Attachment
If you are dealing with an email with a lot of detail, it is advisable to opt for options two and three, as they allow you to add the entire email with attachments as a task. When the due date arrives, users can open the attachment to view crucial details about the task.
When you turn an email into a task in Outlook using this technique, the new task is independent of the original email. This protects your to-do list even if you accidentally delete the message. This is the best way to create Outlook task from email and keep the original message in your inbox.
When you make an email a task in Outlook, we recommend moving the message from the inbox into a different folder. This helps keep your inbox organized, increasing your productivity.
Method 2: Flag to Follow Up Emails to Turn into Task
Another way to create task from Outlook email is to flag to follow up from the message tab. This is also a straightforward technique that requires the user to select the message they want to convert and click on it.
After opening and reading the message email on its window, click the “Home” tab of the ribbon, and then click the “Tags” panel to select “Follow Up.” Choose a specific flag from the drop-down menu and apply it to the task email.
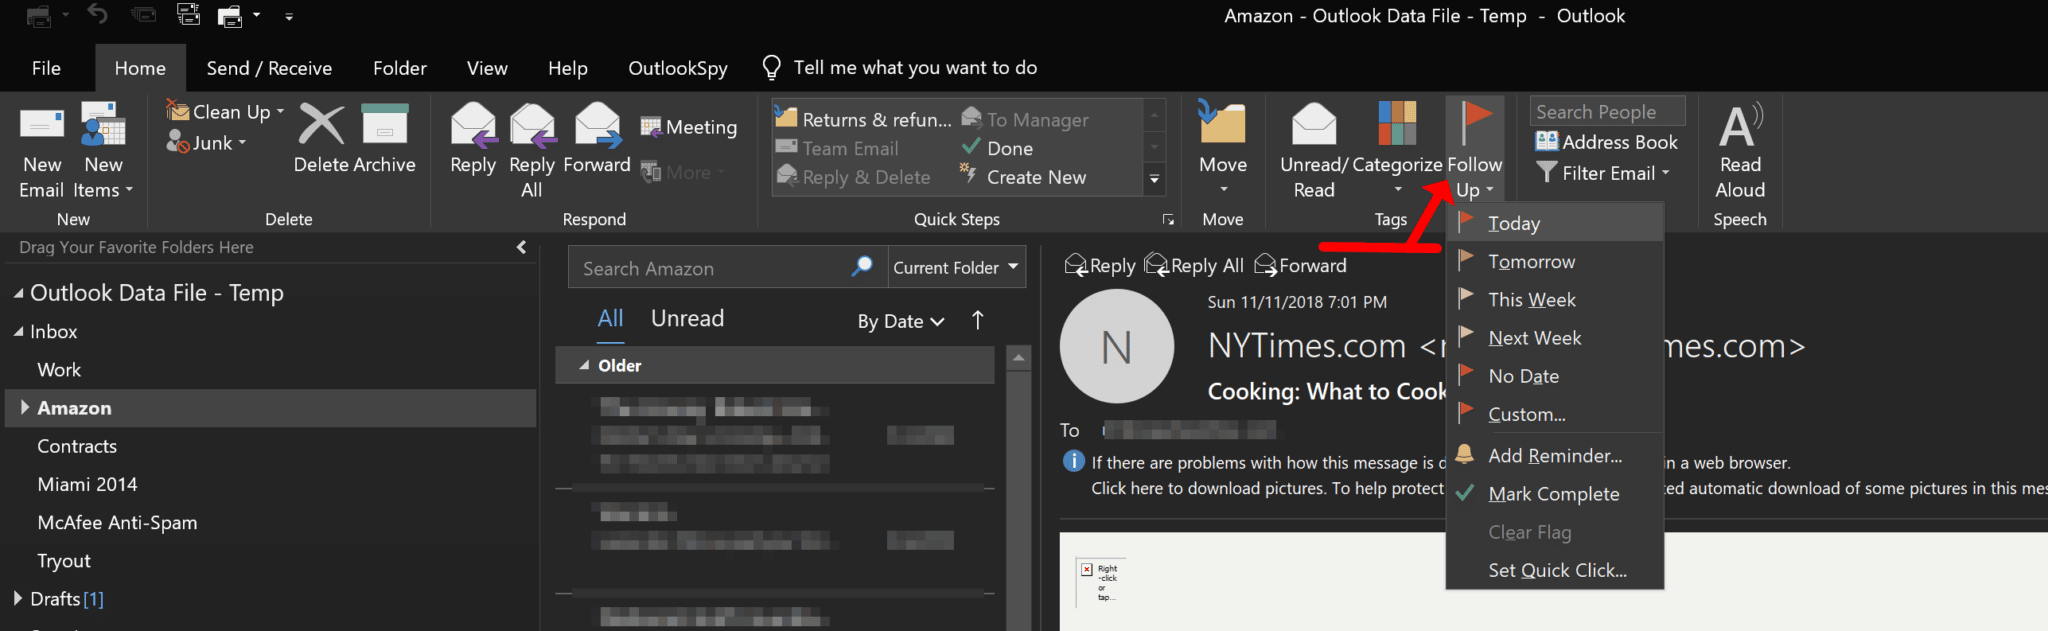

However, the flag to follow-up emails technique has one downside: if the message is deleted, the task automatically disappears from the to-do list on the Tasks peek. This is because flagging doesn’t create an entirely new task from the original.
Flag to Follow Up from the Inbox Folder
If you are still wondering how to make an email a task in Outlook, the easiest way is by flagging to follow up from the inbox folder. Users can flag the message to appear in the to-do list as a task. You don’t have to open the email to flag it; you can do all that in the inbox folder.
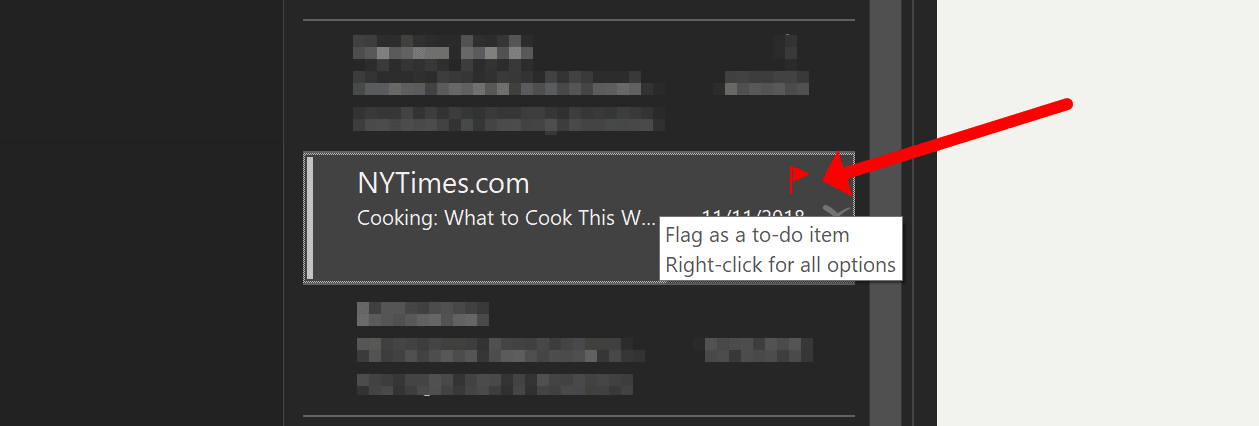

Hover over the message you want to convert into a task email, and use quick clicks in the inbox to flag the message. A flag icon appears in the upper-right corner when you hold the pointer over a message, allowing you to click over it and flag it.
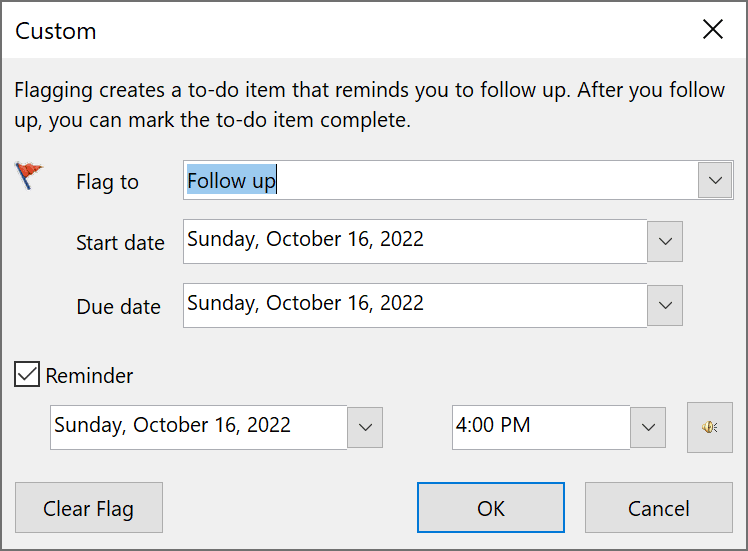
For the More Advanced, There Are Advanced Options
More advanced options are offered when you right-click on the flag icon. You can set a reminder or choose when you’d like to be reminded of the task in the options provided in the drop-down menu. It also allows users to customize the task email by adding specific start and due dates missing from the dialogue box.
This method of converting an Outlook email to a task entails creating a to-do list that reminds you to follow up without frequently opening the email message. If you are wondering how to make an email a task in Outlook, these three techniques can help you get started. So there you go.

That’s how you can turn an email into a task in Outlook, and we can help you understand how Microsoft Cloud technologies work and how to become more organized with your work.
Create a Task Out of Any Other Outlook Items
Outlook offers more than just basic email operations and converting emails to meetings. It helps you organize your work more efficiently through plenty of other extra items that allow you to create a new task and set a reminder to ensure completion before the deadline.
There are instances when users want to export Outlook items elsewhere or back them up. If you intend to export tasks when moving to a different machine or upgrading the system, Outlook can ensure you don’t lose assignments or deliver them past the due date.
This popular tool allows you to assess tasks in your to-do list along with the icons for your phone numbers and calendar. Here are vital steps to create a task out of any other Outlook items and achieve flawless results.
How to Create a Task
The most common scenario is exporting Outlook tasks to excel. If you prefer doing it manually, there’s an in-built functionality to move your assignments to a spreadsheet. The wizard is summoned differently depending on your version of Outlook, so you should use a method that suits your version to make the process efficient and fast.
Stage 1. Exporting Outlook Tasks into CSV
Once the wizard opens, click through the screens and let the systems guide you through the various adjustments required. The window will prompt you to specify the date range by pressing OK, and Outlook tasks will be exported with a CSV extension. You don’t have to be an expert to use this tool, and after the process, you’ll receive a warning message that the target format doesn’t support recurring tasks or appointments.
When this is complete, you can open the file in Excel, allowing you to save it to an external storage or physically move it to another PC. The final step of converting as CSV is simple –the exported file only stores a single sheet without formulas and formatting, while an Excel file offers enhanced flexibility.
Stage 2. Converting the Format
You can now find the new task or file after exporting Outlook email to tasks to Excel. This allows you to create a CSV file and open it in Excel to change the format to the Excel workbook and apply any formatting you need. These steps can help you achieve this:
- Find the exported file (*.csv) and open it in Excel by double-clicking it.
- Assess the content and open the File menu.
- Save it as an excel spreadsheet.
If you find a perfectly compatible file with Excel, you can split it into multiple sheets and apply fonts, colors, and many other formatting options. This is not possible with plain CSV text. Users can also leverage third-party converters to transfer Outlook assignments.
Read also