This post is written as a guide on using Gmail with Thunderbird and synchronizing the data from a Gmail account with the one in Thunderbird. It is important to note that the proper work of Thunderbird with Gmail can be expected only if you use version 38 or more recent one. The previous ones do not properly work with Google Mail.
The First Step to Add Gmail to Thunderbird
Lots of users may face problems with the Gmail Thunderbird integration. There can be plenty of reasons for this, however, among the common ones, it is possible to mention the omission of the step enabling IMAP on Gmail. On new accounts, it should be enabled by default. In any case, it is necessary to check. While on the page with a Gmail account, press on the Settings gear that is located in the right top corner. In the drop-down list, click on Settings. In the window that appears, it is necessary to find the tab Forwarding and POP/IMAP. In the section IMAP Access, check Enable IMAP and save the changes.
In general, these are all the Gmail settings for Thunderbird that should be done. After saving the changes, you may also refresh the web page and check again if the changes have indeed been applied.
The Next Step of Thunderbird Settings for Gmail
After fulfilling the above step, open your Thunderbird profile on the desktop:
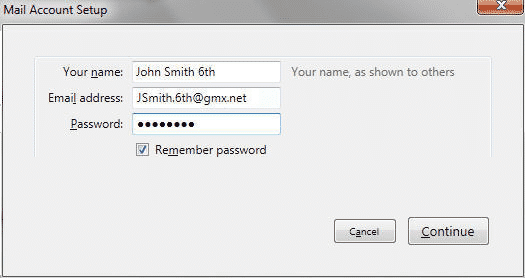
Press on File ➩ opt New ➩ press on Existing Mail Account… The dialogue window Mail Account Setup will appear. In this window, it is necessary to provide the data related to proceed with the Thunderbird Gmail setup: full name, email, as well as password. After you press on the button Continue, Gmail on Thunderbird will be automatically configured.
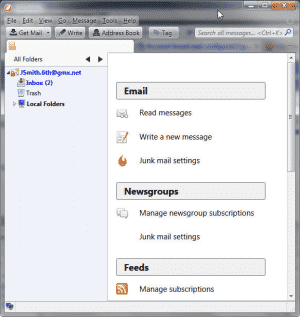
Then, it can be needed to sign in your Gmail account. Do this and wait for the synchronization of the messages from Gmail in Thunderbird. After this, a user can access emails from Google on Thunderbird.
Troubleshooting of Possible Problems
In the process of adding an account from Google, certain problems can appear. For example, one can read the message “Thunderbird failed to find the settings for your email account.” To eliminate this Thunderbird Gmail not working trouble, a user will have to take certain steps to manually set up the details of the server. Here are the steps on how to proceed in the section of the incoming mail server:
➩ In the field IMAP Server, type imap.gmail.com.
➩ Indicate the Port that is 993.
➩ Require SSL: here, it is necessary to choose Yes.
➩ Username: here, one should type a Gmail email address.
➩ Password: in this field, the password from the Gmail account should be typed.
For the server of outgoing mails:
- In the field SMTP Server, type smtp.gmail.com.
- As for Port for SSL, type 465.
- Indicate the Port for TLS/STARTTLS that is 587.
- Require SSL: here, it is necessary to choose Yes.
- Require TLS: here, opt for Yes (if available).
- In the field Require authentication, choose Yes.
- Username: here, one should type a Gmail email address.
- Password: in this field, the password from the Gmail account should be typed.
After making the above settings and saving them, it will be possible to eliminate the problem of Thunderbird can’t connect to Gmail. Repeat step 2, as described above, and emails from Gmail will be synchronized with the Thunderbird account.
Tips to Work With Thunderbird Gmail Accounts
After the process of synchronization is over, and emails from Gmail are visible in Thunderbird, it is necessary to know how the folders are arranged. As IMAP is enabled on Google account, the labels a user puts in the Gmail account become separate folders in Thunderbird. Thus, Gmail Thunderbird settings are interconnected: after labeling an email in Gmail, a new folder is created in Thunderbird where this email is stored.
When synchronization of Gmail and Thunderbird is carried out, all the folders from Google Mail are added to Thunderbird. However, this can be configured in the following way:
- Open Thunderbird and press on File and choose Subscribe.
- Have a look at the list of folders that are displayed and uncheck undesired ones.
- After you save the changes, these folders will be no longer displayed while the emails will be added to the folder All Mail.
Useful Mozilla Features
In Thunderbird, there are add-ons that provide additional functions. Among them, a user can download themes from the web. It is necessary to click on the Add-ons icon in the main window. Check available themes, find those you like, click on the name. You will be redirected to the page where the button Add to Thunderbird should be pressed. A window will appear. In it, it is necessary to click on the button Allow.
After the download, the theme will be automatically applied. If you want to change a theme, press on the tab Appearance where it is possible to enable or delete themes.
There is also the possibility to sort letters in Mozilla. After in Thunderbird you add the account, on the main menu, press on Message Filters. Select the filter and choose an account to which it should be applied.
For every user, there is software that is useful and convenient. If you have decided to make Thunderbird your primary email client, be sure to correctly set the server details and conveniently add the Gmail account that will be synchronized with Thunderbird.
How to import Gmail emails to Thunderbird
If you need to add emails saved in Gmail backup mailboxes to Thunderbird, you may do the following:
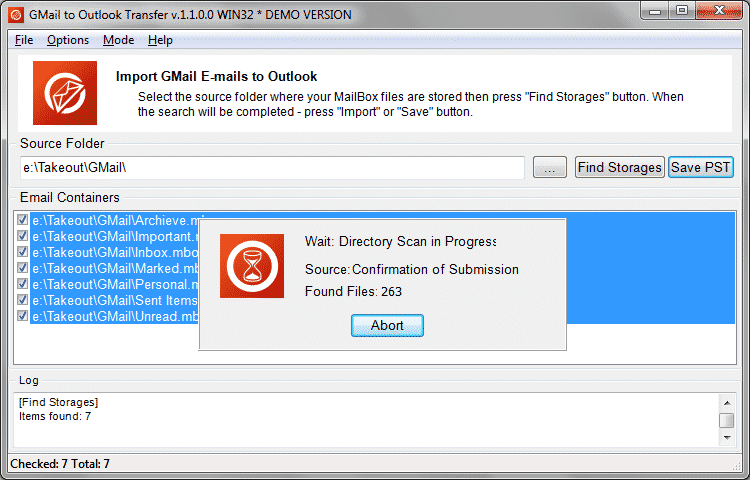
- Download special tool which works with Gmail mailboxes
- Run it, select menu “Mode” and choose “Save to EML files” item
- Specify the location of Gmail mailbox files, and read them by pressing “Scan Folder” button
- Press “Save EML” button and specify a location to save extracted Gmail emails
- Complete the conversion and close the program
Now you have everything needed and may import emails to Thunderbird. For that:
- Run Thunderbird and create a new folder if needed
- Run Windows File Explorer and open the location of EML files
- Select all EML files (Ctrl+A)
- Put mouse pointer on the selection then press and hold the left mouse button
- Move the selection to the Thunderbird window and the folder where you want to import emails
- Release mouse button
- All selected EML files will be imported into Thunderbird folder
What is the Mozilla Thunderbird Profile
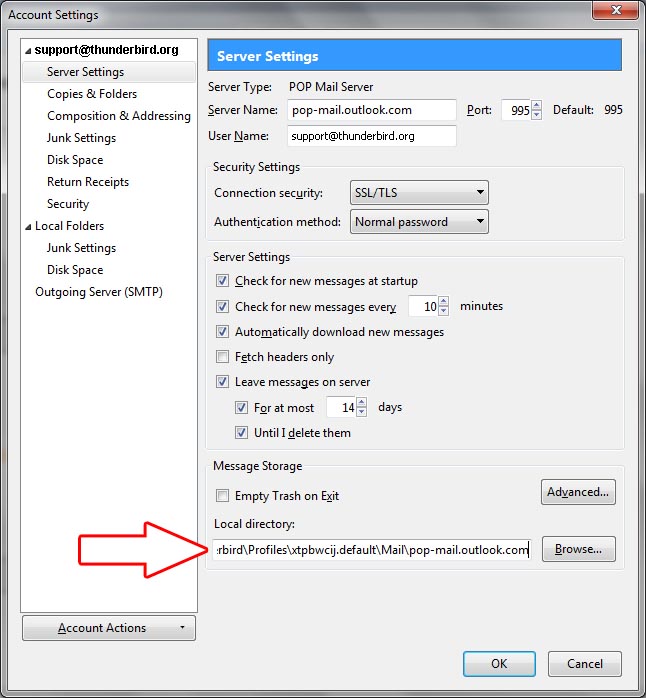
Now you should indicate the folder for storing mail. To do this, click RMB on the name of the account and select “Options“.
When thinking about how to add Gmail to a Thunderbird, you should learn about a Thunderbird profile first. A profile is a piece of information that is generated during the operation of the mail client but does not apply to the executable files of the program.
It includes the following:
- copies of email messages (depending on settings);
- user settings (themes, toolbars, etc.).
Immediately after installation, Mozilla Thunderbird creates a profile called default. The program will use it in the future unless you specifically create a new one using the Profile Manager.
Where Thunderbird Emails are Stored
When creating a profile, the name xxx.uuu is assigned, where xxx is eight numbers randomly generated by the program, and uuu is its display name. In different versions of the OS, the location of the profile files is different. To quickly find a profile, you should click on the button of the main menu of the program and click “Help”. Clicking on the “Open folder” will take you to the target directory, where you will see the required files.
Profile Backup and restore
To back up your Mozilla Thunderbird profile files, you need to follow a simple algorithm:
- close the program;
- open the directory with profile files in the manner indicated above;
- go to the level above and copy the profile folder with the name xxx.uuu;
- save the directory to the target location on disk.
You can store a backup copy both on the computer’s hard drive and on such external media like optical disks, flash drives, file sharing, and cloud servers. To restore a Gmail Mozilla Thunderbird profile, simply copy the folder to the destination directory with the replacement files. If the procedure is carried out after reinstalling the OS and the default profile is assigned a different name, you should copy not the folder, but only the files contained in it.
Themes and Design
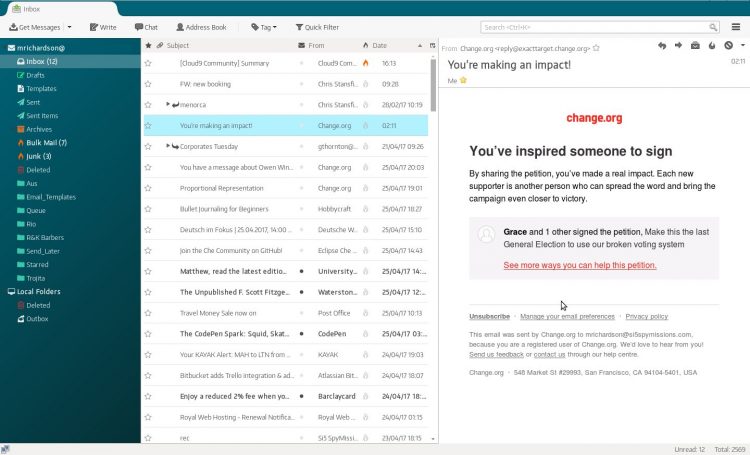
Mozilla Thunderbird themes are presented as separate add-ons that need to be downloaded from the Internet. You can do this without visiting third-party resources immediately in the program window. To do this, click on the item “Add-ons” in the main window. Once you find a suitable theme, click on its name, and on the next page, click the “Add to Thunderbird” button. Remember to also click the “Allow” button in the pop-up window.
The downloaded theme is applied automatically. If you have downloaded several themes and you want to switch between them, go to the “Appearance” tab of the add-on control menu and click the “Enable” button. In the same menu, you can delete Mozilla Thunderbird themes that you no longer like.
Sort Letters
You can set one or more filters to automate actions with received or sent correspondence. To create a new filter, go to the main menu of the program, and select “Message Filters“. Then select the account to which the filter will be applied and click the “Create” button.


