Connecting an email account to Outlook creates a local backup of that data on your PC. You may retrieve already downloaded or synced emails, calendar entries, contact information, and activities with no internet connection.
In this article, we look at the pst format, why it is convenient for Outlook users, why users may need to create a new PST file in Outlook, and how to create such files.
What is a PST File Format and Why is it Convenient for MS Outlook Users?
Microsoft applications use a personal storage table PST file to store data such as calendar events, contact information, and emails. PST files are used by popular Microsoft programs such as Microsoft Exchange Client, Windows Messaging, and, in this case, MS Outlook. PST files are convenient because they are portable, making it easy to move and archive Outlook data files from one place/machine/account to another.
Why Do You Need to Create New PST Files?
Apart from the portability of .PST files, there are other reasons why you may want to create them. Here, we highlight some of them:
- Moving your emails to your local .pst file gives you an extra layer of security, should you feel it is necessary.
- The .pst files, since they are offline and portable, can be used as a backup in the event of a disaster or recovery.
- If your mailbox size is limited and you do not want to delete anything, you could move it into a .pst file before cleaning up.
How to Create a New PST File in Outlook?
Although MS Outlook automatically creates a new Outlook pst file, much the same way Word creates .docx files, there are ways to do it manually. Let’s talk about them.
Method 1: Create a New PST Via the New Items option
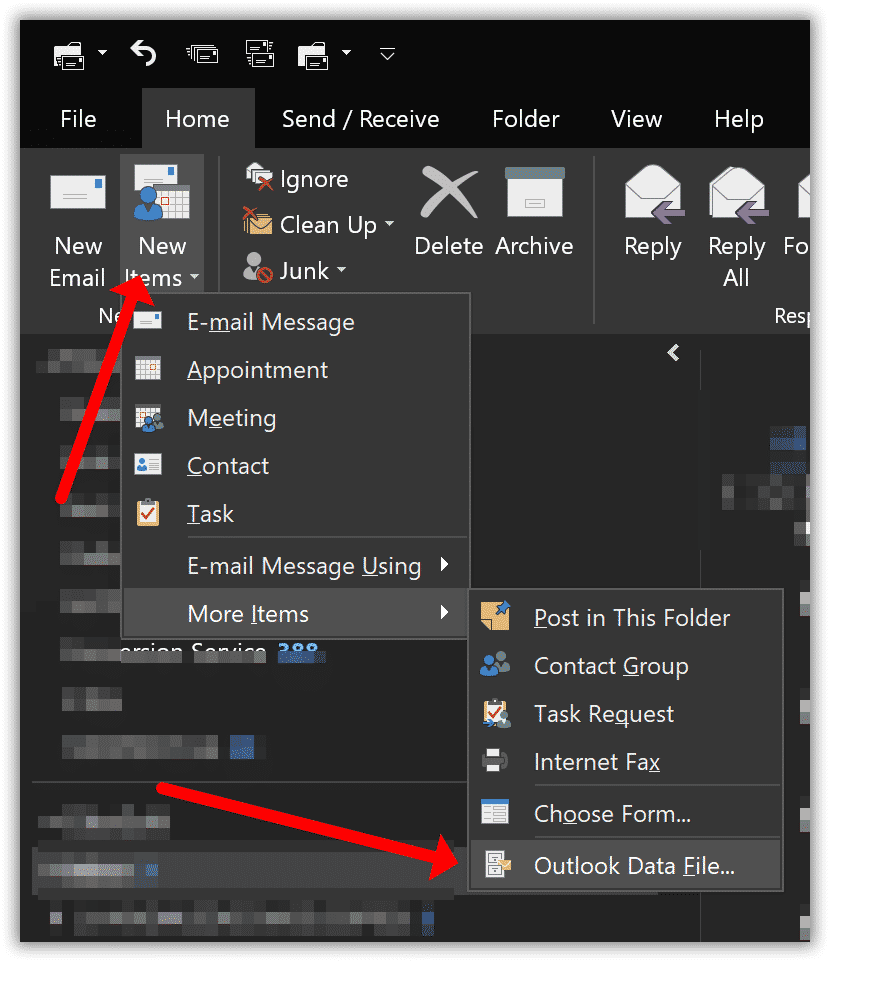
To create PST files using the ‘New Items’ option, follow these steps:
-
- While in the Inbox, click on New Items > More Items > and then click Outlook Data File
- Give the file a name.
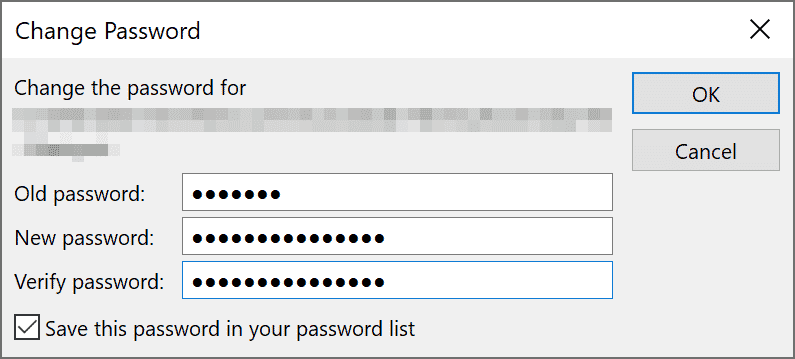
- If you need a password protected pst file, click on the Add Optional Password box to protect your Outlook pst file with a password.
- Click OK, type in the password (you will need to enter it twice to verify), and click OK again.
When setting the password, you must enter it every time that file is opened.
Method 2: Create New Outlook Data File Using the Import & Export Wizard
To Export
To start the tool, go to the File tab and click on MS Outlook Options to select Advanced.
-
- Click on Export
- Select Export to a file and click on Next
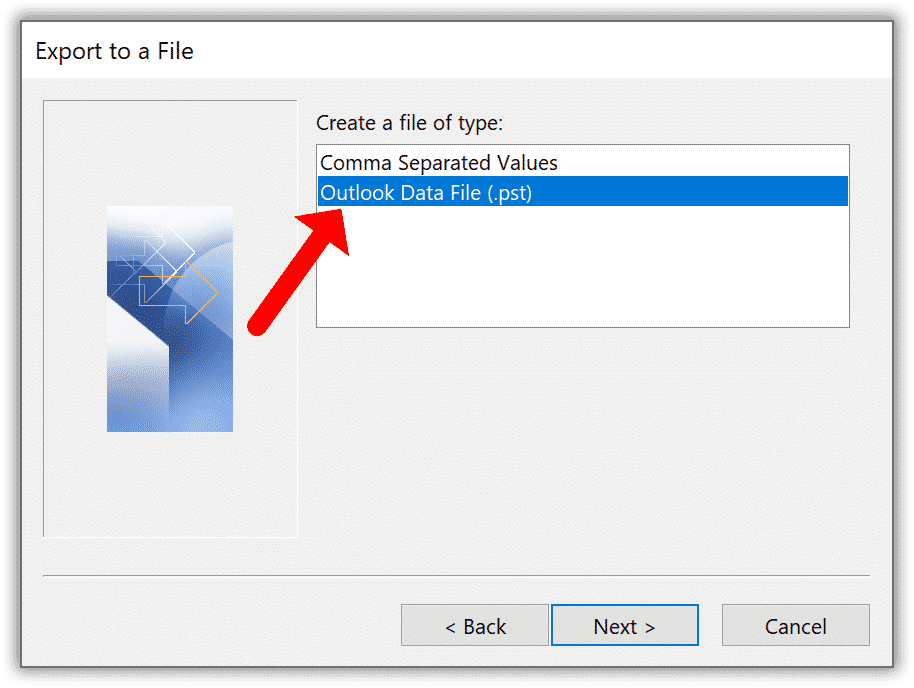
- Choose Outlook Data File (.pst) and click on Next
- Click on Browse to choose where you want the new file to be saved.
- In the file namespace, type the name you would like to save it under and click OK.
Click on Finish to complete the process.
Read how to Export mailbox from Outlook
To Import
You can use backup copies of your .pst file to restore Microsoft Outlook data when original files are lost or damaged. To import, go to the File tab, click on Open, and then Import.
-
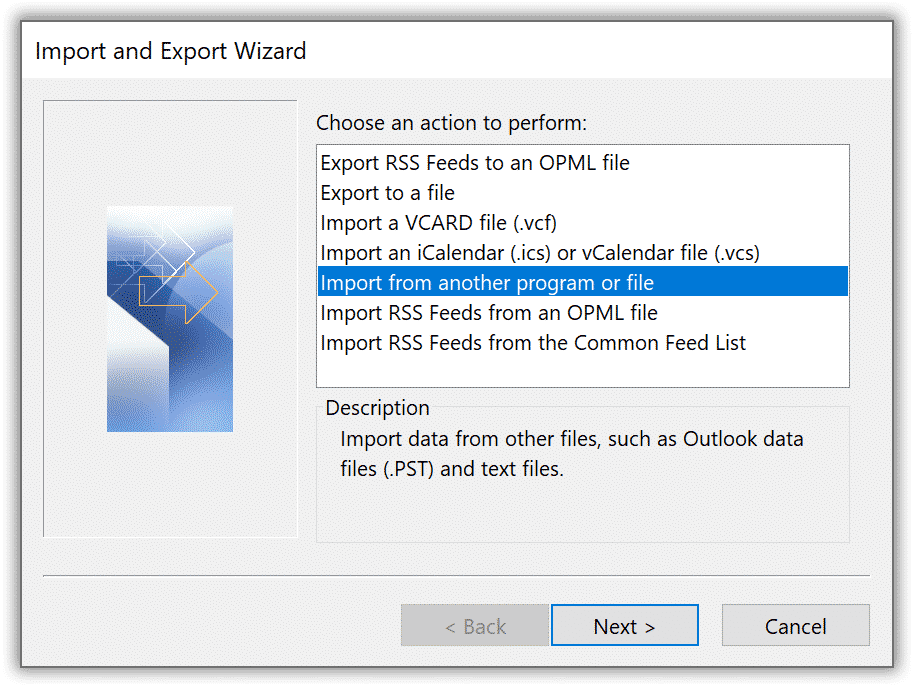
- Click on Import from another program or file and click on Next
- Choose the Outlook Data Files (.pst) and click on Next
- Type the file name or browse the PC to select data files or a single file you want to import.
- Click on Import from another program or file and click on Next
NOTE: Microsoft recommends clicking on Do not import duplicates unless you want to replace or duplicate items already in Outlook with the imported information.
-
- Click on Next and choose the folder you would like to import. If you want to import everything in your .pst file, click on the top of the hierarchy.
NOTE: Microsoft says that the top pst folder (often the Personal Folders, Outlook Data File, or the email address) is selected by default. Include subfolders are also chosen by default. Every Outlook files folder under the selected folder is also imported.
Method 3: Set Up .pst File Using Outlook Account Settings
To set up a .pst file in Outlook from your Outlook Account follow these steps:
-
- Start by opening Outlook
- Click on File > Select Info and Account Settings
- Click on Data Files and the Add button
- Choose a File Name
- Select the file type .pst and click OK
Conclusion
Outlook captures all the material needed for everyday chores, meetings, emails, and other information. More crucially, it lets a person utilize the same application to deal with a wide range of data.
Moving information around quickly, recovering what is needed, and archiving old data is much easier if you know how to create .pst files.
Frequently Asked Questions
Does Outlook automatically create PST files?
Yes, it does. All your messages, meetings, notes, tasks, and more are automatically saved on your PC in a storage folder such as .pst files and your Mailbox.
How do I create a new PST file without Outlook?
Without Outlook or Exchange, you cannot create a new PST file.
How do I save Outlook emails as PST?
To save Outlook emails as .pst, you can leverage Outlook Transfer to make it easy and error-free.
